Classifications
This feature is available in Enhanced Asset Management.
Asset classifications identify and characterize similar assets, gathering them into groups, locations, or any custom classification.
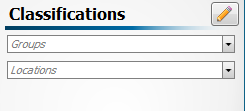
The Classifications pane (in Fixed Asset Manager) allows you to assign the Asset Classifications that you have already set up to the new and/or existing assets in the tax return.

Fixed Assets - Classifications pane
To rollover asset classifications from Fixed Asset Manager:
You can rollover Group, Location, or Custom classifications from Fixed Asset Manager 2018 into ATX and into your Form 4562:
- In Rollover Manager, under Other Data, select the Asset Classifications check box. (The number of asset classifications should appear in parentheses.)
- Click the Rollover icon.
To verify, open a Form 4562 in any return. The Classifications pane should contain any Group, Location, or custom classifications that you created in Fixed Asset Manager 2018.
Global vs. Local Classifications
By default, any asset classifications you create are saved locally to the computer where they are created.
To make classifications globally available to all ATX users on a network, select the Save Globally check box on the Asset Classification dialog box.
Custom Classification
To add a custom asset classification:
- From an open return with the Fixed Assets tab open, click the
 (Edit) button in the Classifications pane.

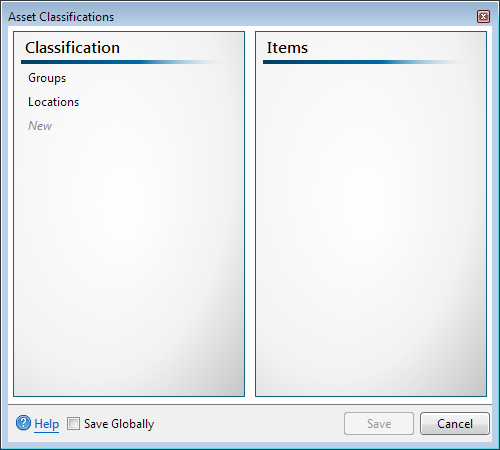
Asset Classification dialog box
- Click New and enter the name of the Classification.
- Once you have completed entering all your classifications, click Save.
When you add a new asset classification, the classification remains specific to the local user and is not seen globally (by other users) unless you select the Save Globally button in the Classifications pane.
Add Items to a Classification
To add items to a classification:
- From an open return with the Fixed Assets tab open, click the
 (Edit) button in the Classifications pane.

Asset Classification dialog box
- Select classification in the Classification column.
- Click New in the Items column and enter the name of the item.
- Once you have completed entering all your items for each Classification, click Save.
- Click Save at the bottom of the dialog box.
Assigning Classifications to Assets
To assign classifications to an asset:
- Open the asset.
- In the Classifications pane, click the drop-down for Groups, Locations or Custom Class.
- Select the item you want to assign.
Delete Classifications and Items
To delete a classification or item from a classification:
- In the Classification column, select the classification, or item you wish to delete.
- Click the red x, to delete the items or custom classification.
The default classifications Groups or Locations can not be deleted. Deleting a custom classification deletes all items within the custom classification.

Asset Classification Item